
작업도중, 외부의 사진을 앱 내로 가져와야하는 작업이 생겼다.
일단, Asset Store에서 아래의 에셋을 임포트하자.
Native Gallery for Android & iOS | 기능 통합 | Unity Asset Store
Use the Native Gallery for Android & iOS from yasirkula on your next project. Find this integration tool & more on the Unity Asset Store.
assetstore.unity.com
에셋을 임포트했다면 모든 준비가 끝났다.
일단 유니티에서 버튼과 RawImg를 만들자.
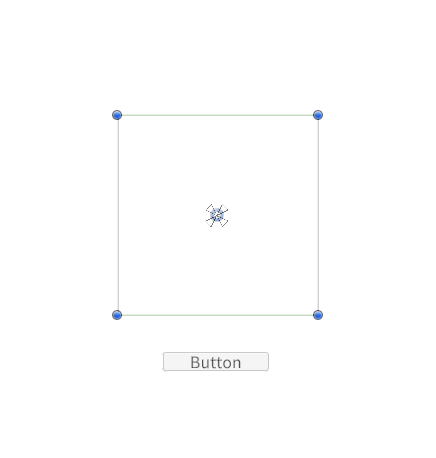
이런식으로 배치를 했다.
그리고 스크립트를 작성하자.
using System.Collections;
using System.Collections.Generic;
using UnityEngine;
using UnityEngine.UI;
using System.IO;

public class LoadImg : MonoBehaviour
{
    public RawImage img;

    public void OnImgLoadBtnClick(){
        NativeGallery.GetImageFromGallery((file) => {
            FileInfo selectedImg = new FileInfo(file); //선택한 이미지가 selected가 됨.

            //용량제한
            if(selectedImg.Length > 10 ){ //length는 byte임. 따라서 50,000,000 byte = 50MB
                return;
            }

            //불러오기
            if(!string.IsNullOrEmpty(file)){ //파일이 존재할 때
                StartCoroutine(LoadCoroutine(file));
            }
        });
    }

    IEnumerator LoadCoroutine(string path){ //
        yield return null;

        byte[] fileData = File.ReadAllBytes(path);
        string fileName = Path.GetFileName(path).Split('.')[0]; //확장자명 제외하고 이름으로 저장.
        string savePath = Application.persistentDataPath + "/Image"; //내부 저장경로에 있는 Image폴더 안에 저장.

        if(!Directory.Exists(savePath)){
            Directory.CreateDirectory(savePath); //폴더가 존재하지 않는다면 폴더를 만든다.
        }

        File.WriteAllBytes(savePath + fileName + ".png", fileData);

        var temp = File.ReadAllBytes(savePath + fileName + ".png");//경로에 있는 파일을 불러와서 이미지에 넣음

        Texture2D tex = new Texture2D(0,0);
        tex.LoadImage(temp); //byte배열을 Texture2D로 변경

        img.texture = tex;
        img.SetNativeSize(); //이미지의 크기대로 RawImg를 변환
        ImgSizeSetting(img, 1000,1000);
    }

    private void ImgSizeSetting(RawImage img, float x, float y){ //x,y 가로, 세로의 최대크기
        var imgX = img.rectTransform.sizeDelta.x;
        var imgY = img.rectTransform.sizeDelta.y;

        //비율 구하기
        //x,y가 정사각형일땐 1이다. (물론, 정사각형이 아니라면 1이 아니게 된다.)
        //imgX/imgY에서 Y가 더 크다면 세로길이가 더 긴것. (값은 1보다 작게 된다.)
        //X가 더 크다면 가로 길이가 더 긴것.(값은 1보다 더 크게 된다.)
        if( x / y > imgX / imgY ){ //이미지의 세로 길이가 더 길다.
            img.rectTransform.SetSizeWithCurrentAnchors(RectTransform.Axis.Vertical, y); // imgY * y / imgY = y 이기때문에 y이다.
            img.rectTransform.SetSizeWithCurrentAnchors(RectTransform.Axis.Horizontal, imgX * (y / imgY));
        }
        else{ //이미지의 가로 길이가 더 길다.
            img.rectTransform.SetSizeWithCurrentAnchors(RectTransform.Axis.Horizontal, x);
            img.rectTransform.SetSizeWithCurrentAnchors(RectTransform.Axis.Vertical, imgY * (x / imgX));
        }
    }
}
물론 NativeGallery에서 GetImgesFromGallery를 사용하면 사진 여러장을 불러올 수 있고, GetVideoFromGallery를 사용하면 동영상도 불러올 수 있다. 필요한 부분은 직접 구현해보자.
코드를 작성한 다음, 버튼에 함수를 연결해주고, 실행해서 확인하자.
모바일 환경이 필요한거라, 따로 빌드해서 올리진 않았다.
모든 과정은 아래의 링크에서 참고하였다.
'Develop > Unity' 카테고리의 다른 글
| 무료 에셋 정리 (2) | 2025.03.20 |
|---|---|
| [Unity] 이벤트의 구현을 지원하는 Signaler를 사용해보자! (echo17.Signaler) (0) | 2024.11.16 |
| [Unity] Hierarchy를 정리해보자 (Hierarchy Designer) (0) | 2024.11.04 |
| [Unity] 유니티의 이벤트 - Action이벤트 (0) | 2024.10.24 |
| [Unity] 유니티에서 라디오버튼 구현하기 (Unity RadioButton) (0) | 2024.07.22 |
작업도중, 외부의 사진을 앱 내로 가져와야하는 작업이 생겼다.
일단, Asset Store에서 아래의 에셋을 임포트하자.
Native Gallery for Android & iOS | 기능 통합 | Unity Asset Store
Use the Native Gallery for Android & iOS from yasirkula on your next project. Find this integration tool & more on the Unity Asset Store.
assetstore.unity.com
에셋을 임포트했다면 모든 준비가 끝났다.
일단 유니티에서 버튼과 RawImg를 만들자.
이런식으로 배치를 했다.
그리고 스크립트를 작성하자.
using System.Collections;
using System.Collections.Generic;
using UnityEngine;
using UnityEngine.UI;
using System.IO;

public class LoadImg : MonoBehaviour
{
    public RawImage img;

    public void OnImgLoadBtnClick(){
        NativeGallery.GetImageFromGallery((file) => {
            FileInfo selectedImg = new FileInfo(file); //선택한 이미지가 selected가 됨.

            //용량제한
            if(selectedImg.Length > 10 ){ //length는 byte임. 따라서 50,000,000 byte = 50MB
                return;
            }

            //불러오기
            if(!string.IsNullOrEmpty(file)){ //파일이 존재할 때
                StartCoroutine(LoadCoroutine(file));
            }
        });
    }

    IEnumerator LoadCoroutine(string path){ //
        yield return null;

        byte[] fileData = File.ReadAllBytes(path);
        string fileName = Path.GetFileName(path).Split('.')[0]; //확장자명 제외하고 이름으로 저장.
        string savePath = Application.persistentDataPath + "/Image"; //내부 저장경로에 있는 Image폴더 안에 저장.

        if(!Directory.Exists(savePath)){
            Directory.CreateDirectory(savePath); //폴더가 존재하지 않는다면 폴더를 만든다.
        }

        File.WriteAllBytes(savePath + fileName + ".png", fileData);

        var temp = File.ReadAllBytes(savePath + fileName + ".png");//경로에 있는 파일을 불러와서 이미지에 넣음

        Texture2D tex = new Texture2D(0,0);
        tex.LoadImage(temp); //byte배열을 Texture2D로 변경

        img.texture = tex;
        img.SetNativeSize(); //이미지의 크기대로 RawImg를 변환
        ImgSizeSetting(img, 1000,1000);
    }

    private void ImgSizeSetting(RawImage img, float x, float y){ //x,y 가로, 세로의 최대크기
        var imgX = img.rectTransform.sizeDelta.x;
        var imgY = img.rectTransform.sizeDelta.y;

        //비율 구하기
        //x,y가 정사각형일땐 1이다. (물론, 정사각형이 아니라면 1이 아니게 된다.)
        //imgX/imgY에서 Y가 더 크다면 세로길이가 더 긴것. (값은 1보다 작게 된다.)
        //X가 더 크다면 가로 길이가 더 긴것.(값은 1보다 더 크게 된다.)
        if( x / y > imgX / imgY ){ //이미지의 세로 길이가 더 길다.
            img.rectTransform.SetSizeWithCurrentAnchors(RectTransform.Axis.Vertical, y); // imgY * y / imgY = y 이기때문에 y이다.
            img.rectTransform.SetSizeWithCurrentAnchors(RectTransform.Axis.Horizontal, imgX * (y / imgY));
        }
        else{ //이미지의 가로 길이가 더 길다.
            img.rectTransform.SetSizeWithCurrentAnchors(RectTransform.Axis.Horizontal, x);
            img.rectTransform.SetSizeWithCurrentAnchors(RectTransform.Axis.Vertical, imgY * (x / imgX));
        }
    }
}
물론 NativeGallery에서 GetImgesFromGallery를 사용하면 사진 여러장을 불러올 수 있고, GetVideoFromGallery를 사용하면 동영상도 불러올 수 있다. 필요한 부분은 직접 구현해보자.
코드를 작성한 다음, 버튼에 함수를 연결해주고, 실행해서 확인하자.
모바일 환경이 필요한거라, 따로 빌드해서 올리진 않았다.
모든 과정은 아래의 링크에서 참고하였다.
'Develop > Unity' 카테고리의 다른 글
| 무료 에셋 정리 (2) | 2025.03.20 |
|---|---|
| [Unity] 이벤트의 구현을 지원하는 Signaler를 사용해보자! (echo17.Signaler) (0) | 2024.11.16 |
| [Unity] Hierarchy를 정리해보자 (Hierarchy Designer) (0) | 2024.11.04 |
| [Unity] 유니티의 이벤트 - Action이벤트 (0) | 2024.10.24 |
| [Unity] 유니티에서 라디오버튼 구현하기 (Unity RadioButton) (0) | 2024.07.22 |